The basics of laser 3D scanning and more
By now, everyone has heard about 3D printing, making a physical object from a digital file. But how do we get the digital files in the first place? One way is 3D Scanning of course! In a lot of ways, it’s like the reverse of 3D printing except our technology has the bonus of using super cool lasers.
When you scan in 3D you make a digital copy of an object’s physical dimensions on your computer. There’s a bunch of different ways to do this, but typically the process has 3 steps:
- Photos are taken from different angles around the object
- A sensor (our scanner uses laser light) measures the distance from the camera to points on the object’s surface
- Points in common between the photos are triangulated to produce 3D geometry
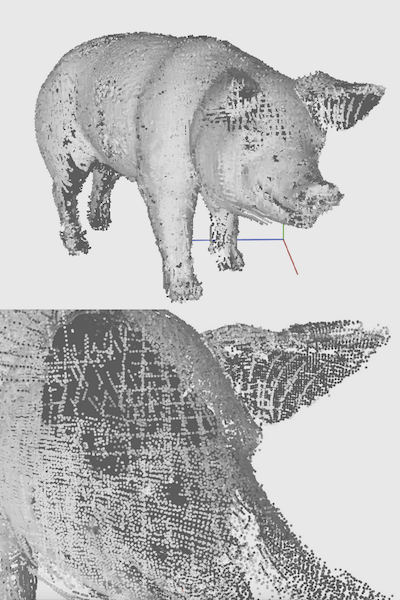
It’s kind of like scanning a 2D picture, except with additional 3D measurements. Each 3D point, calculated from photos and depth measurement, appears on the screen individually. All together they form a point cloud of the object. Zoom in close on a 3D scan and you’ll see the separation of points, like this:
The photos taken during scanning give the point cloud its color, and can be wrapped around a meshed 3D scan as a texture. Capturing the object’s geometry and creating a texture are done separately: the 3D geometry acts as the body, and the texture like clothes.
Geometry Basics
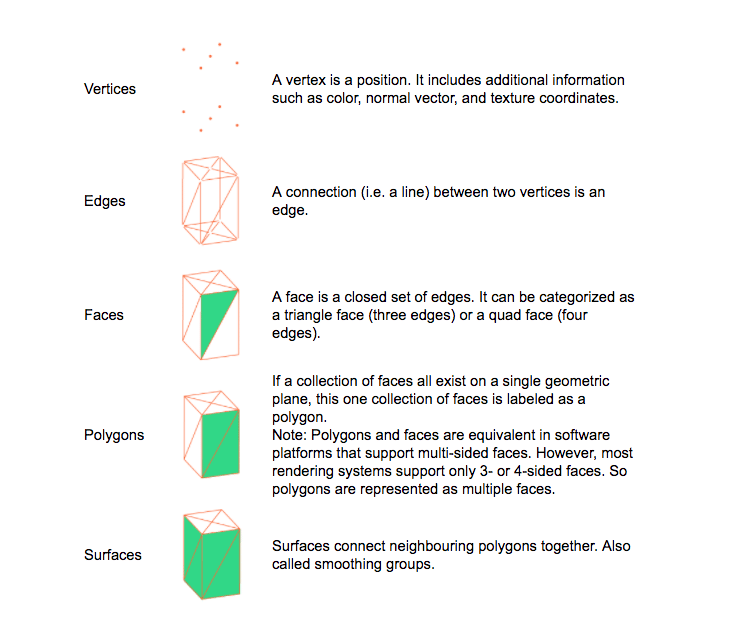
Once created, a 3D point cloud isn’t often useful. With a little math magic, point clouds can be turned into 3D models for 3D printing, prototyping, or creative digital projects. These five simple terms can help beginners understand the nuances.
Meshing a 3D Model
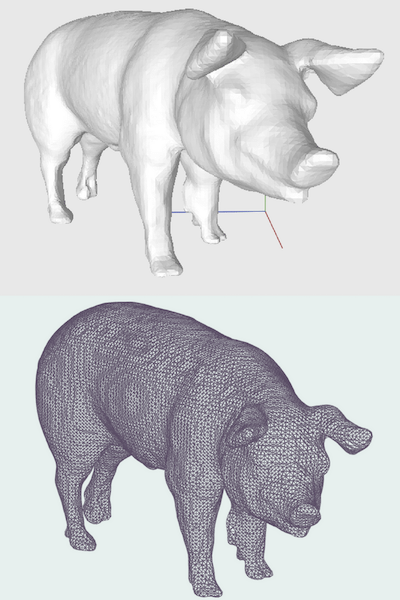
To go from the separate points of a point cloud to a watertight 3D model made of surfaces, you need to mesh your scan. Meshing ‘connects the dots’, so to speak, of a point cloud, transforming it to a model. But if each point is valued equally during meshing, the resulting mesh would be crazy complex, something like this:
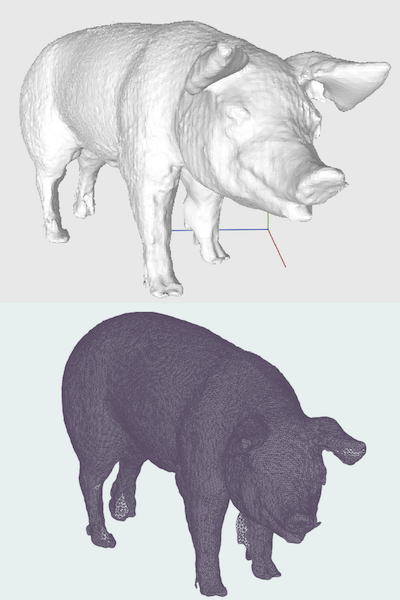
While it’s cool to preserve so much detail, a file with this level of complexity will be super slow to load and work with. Luckily, you can choose to build your mesh in a way that de-prioritizes some the points when constructing appropriate edges and vertices, resulting in a simpler mesh with a lower level of detail:
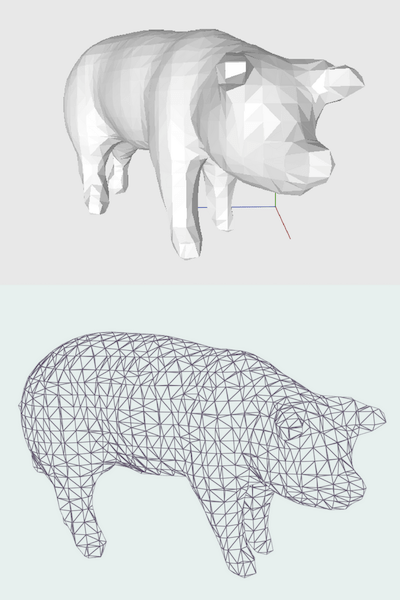 Where to draw the line between adequate detail and fast computing comes down to personal preference, and can change depending on what you’re scanning. With a little experimentation, you’ll find what works best for you. This is what we decided on for our model pig:
File Formats for 3D Models
A raw 3D scan can be saved or exported in different formats, each with its own unique attributes and usually with a specific end in mind.
The most basic point cloud format, XYZ stores points on a coordinate system with X, Y, and Z axes. XYZ files are compatible with most CAD modeling programs, but they don’t save colour information. PLY is another point cloud format, and its also capable of storing color and transparency information (sometimes called the Stanford Triangle Format).
Some file formats save/export meshes. One of the most common is OBJ, a useful file format for 3D computer graphics (CGI) due to it’s texture capabilities (there are even a few 3D printers that can print OBJs and reproduce texture and color). More popular for 3D printing, however, is the STL file format. This format is restricted to triangle-based surfaces, each with a designated inner and outer facing side (called the “normal”). Before being 3D printed, an STL file must be a “watertight mesh”, where all the normals face outward and the surface is continuous, with no holes.
Scanning Equipment
Someday we’ll be able to create 3D models from simple videos recorded on smartphones. Amazing things are happening the 3D scanning world; we’ve made strides incorporating laser scanning technology with smartphone apps, for instance – check out our 3D photography accessory, bevel.
But mostly, 3D scanning requires special equipment. Scanners intended for home-use are usually about the size of a shoebox and are priced in a range between a few hundred dollars to a few thousand. With these products, scanning is restricted to objects of a certain size, typically between a couple inches (2”) to a foot (1’) high. Check out our blog post on affordable desktop scanners or our own Matter and Form Desktop 3D Scanner if you’re interested in learning more.
How Detailed are 3D Scans?
3D scanners claim a certain level of accuracy, but the consistency of this accuracy can vary between objects and different environmental conditions during the scan process. Because 3D scanning relies so heavily on photographs and laser light, a bright, sunny environment can compromise the detail and accuracy captured during a scan.
That said, 3D scanners are used by dentists to create retainers and other oral devices from teeth molds, and by forensic teams to archive and analyze collected evidence.