At Formlabs, we design lots of functional parts for printing on the Form 2 (our stereolithography, or SLA, 3D printer). These parts include things like internal prototypes used for R&D, jigs and fixtures that will be used on our manufacturing lines, and parts for design reviews before the final part is injection molded from a material like nylon.
No matter the application, we often find ourselves needing to combine multiple parts using screws, and now that we’ve released an improved formulation of our Tough engineering resin, the differences between “looks like” prototypes and functional prototypes are decreasing.
This article is a guide to using screws in 3D printed SLA parts. There are many other ways to attach multiple 3D printed parts together, but if you need to repeatedly attach and detach components and want robust mechanical fastening, there’s no real replacement for genuine metal threads.
Design Options for Screw Threads
Let’s take a look at some of the various design options, which we’ve collected over the years within Formlabs and from your suggestions. We’ve ordered these options starting from what we think is the best overall option, with pros and cons of each option listed for different use cases.

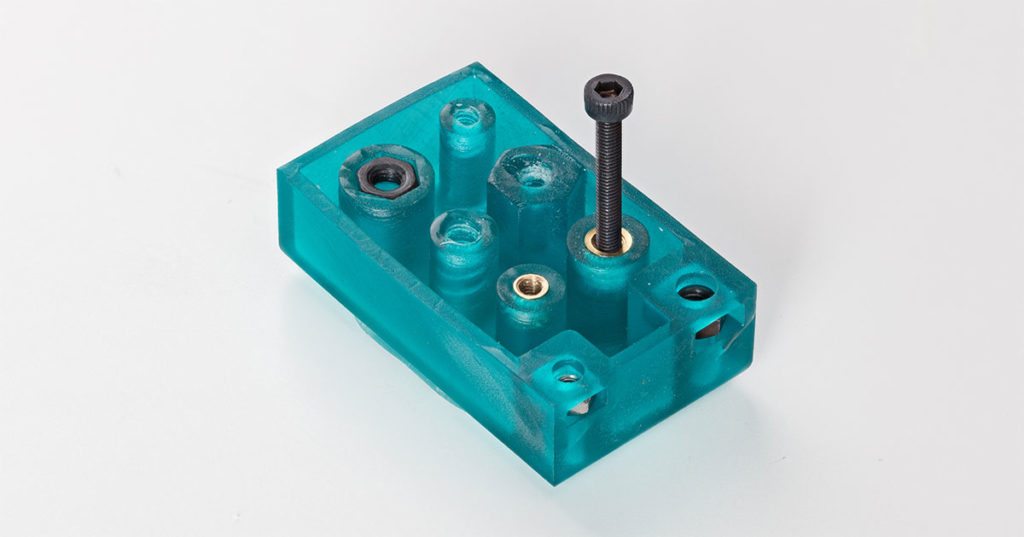
Pros: Strong hold into 3D printed parts without glue. Metal threads are strong and reusable.
Cons: Inserts may loosen at elevated temperatures.
Print a boss with a depth and diameter based on the insert’s specs. Wash with isopropyl alcohol (IPA) and allow to dry without post-curing. Press the insert into the boss using a ball end driver and use a screw to fully expand it and secure it into the surrounding plastic. Then, post-cure the part to reduce the effects of creep and further strengthen the insert’s hold in the plastic. Saving this step for last reduces the chance that the insert will crack the boss when expanded.

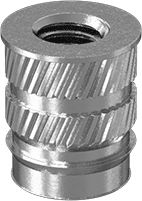
Pros: Very strong hold into 3D printed parts. Metal threads are strong and reusable.
Cons: Requires glue (do not attempt to install with a soldering iron!).
Heat-set inserts are designed to be installed into thermoplastics using a soldering iron with an installation tip. They can be used as designed in acrylic sheets and fused deposition modeling (FDM) parts, but cannot be installed into photopolymer SLA parts, which deflect but don’t melt when heated.
However, the knurling and ridges on heat-set inserts make them very effective for adding threads, as long as you glue them in with either 2-part epoxy or CA glue. Size the boss diameter to the largest diameter of the insert and apply a small bead of glue before installing. Make sure the part is fully dry and cured for best results.
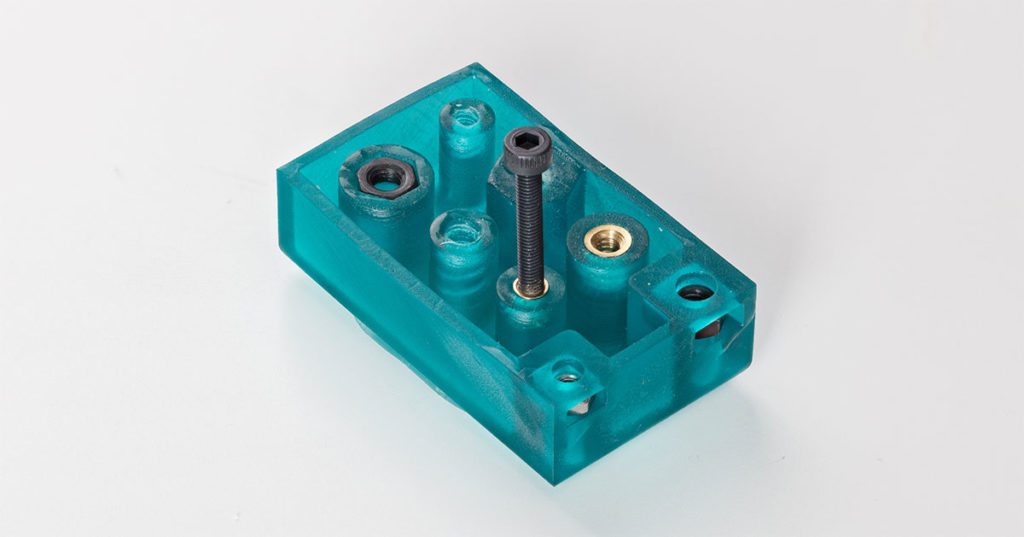
Nut in a Custom 3D Printed Pocket
Pros: Nuts are readily available for whatever size screw you need.
Cons: Side pockets for nuts can eliminate the need for glue, but the part may be harder to support during printing.
Adding a hexagonal pocket to the backside of a face to pressfit a nut creates reusable, robust metal-on-metal contact. For extra twist-out strength, you can choose a square nut. This nut can also be plastic or include locking features. If needed, a drop of CA glue will hold it in place, but modeling in a pocket from the side eliminates the need for glue altogether. Use a 0.1 mm offset around the nut for a press fit, and a clearance hole around the screw itself.
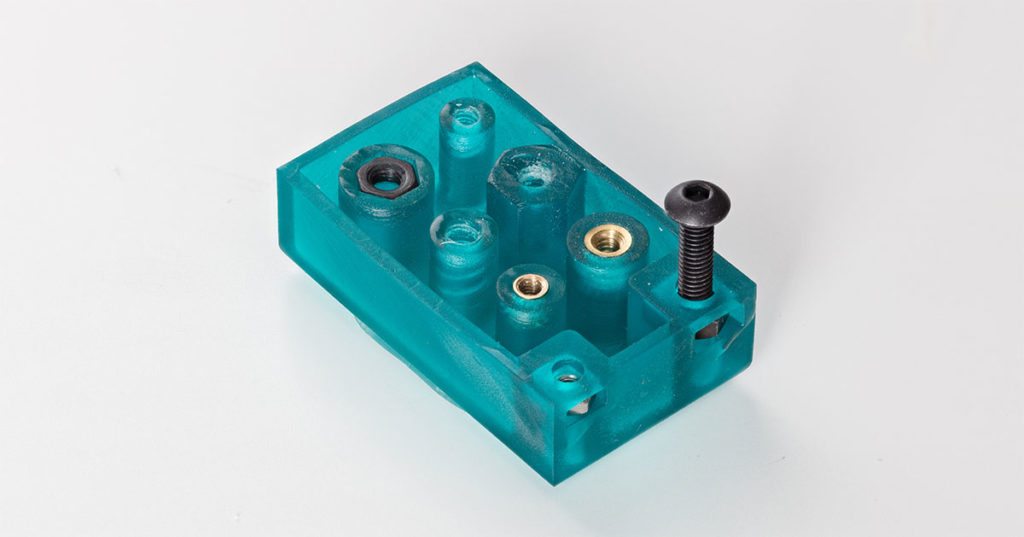
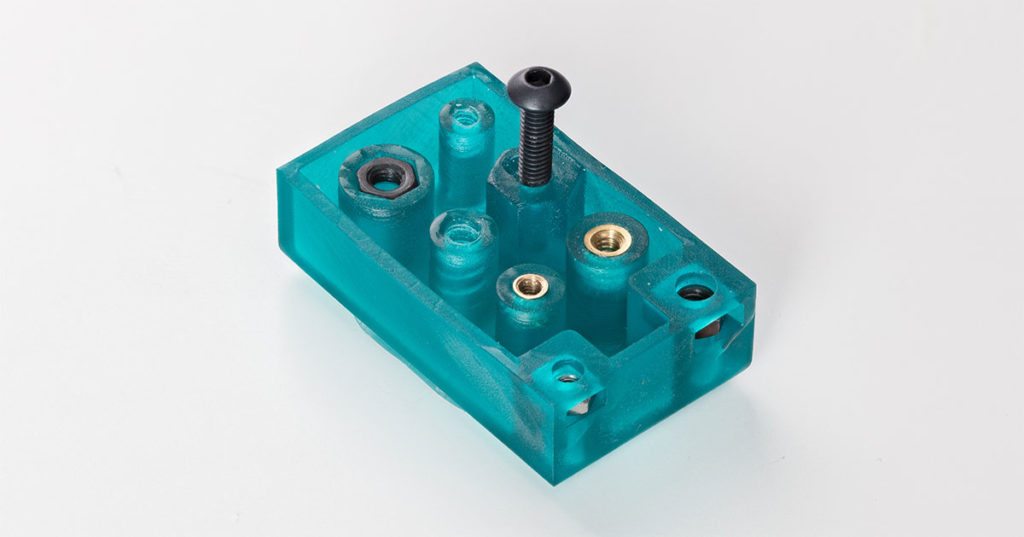
Thread-Cutting or Thread-Forming Screws Designed for Plastics
Pros: Use the same exact hardware in prototyping as with production injection molded parts. Bosses made with Tough (and Durable) are unlikely to crack if you follow the boss design guidelines from the screw manufacturer.
Cons: The screws hold firmly, but the threads won’t hold up to repeated use the way metal threads will. Standard resins will work, but are more likely to crack.
Follow the manufacturer’s guidelines for boss dimensions and print using engineering materials with high impact strength (such as our Tough or Durable resins). Fully post-cure parts before using the screws. If you’re creating a prototype for an injection molded part that will use threadforming or threadcutting screws in its final assembly, this is a good option for printing it out and testing it.
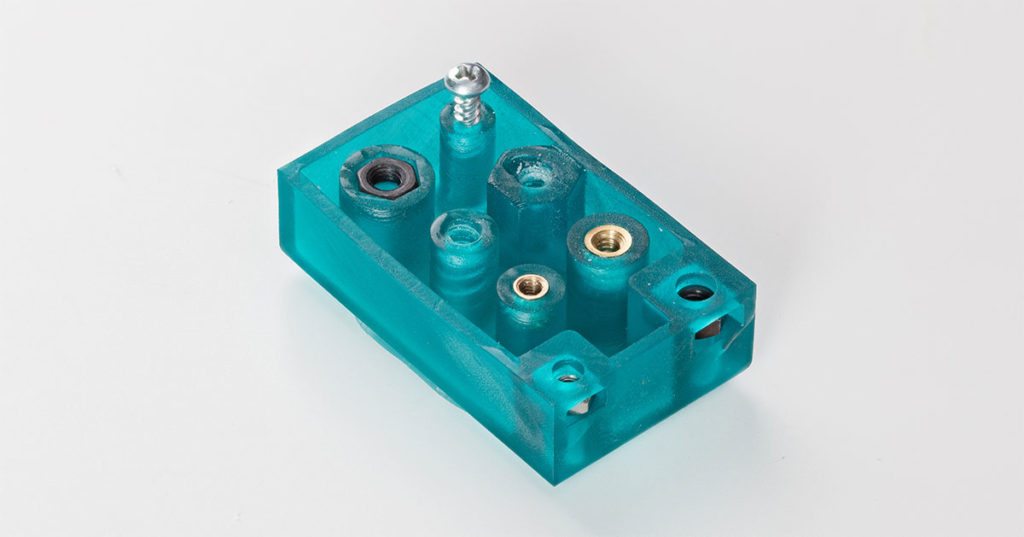
Wood Screws
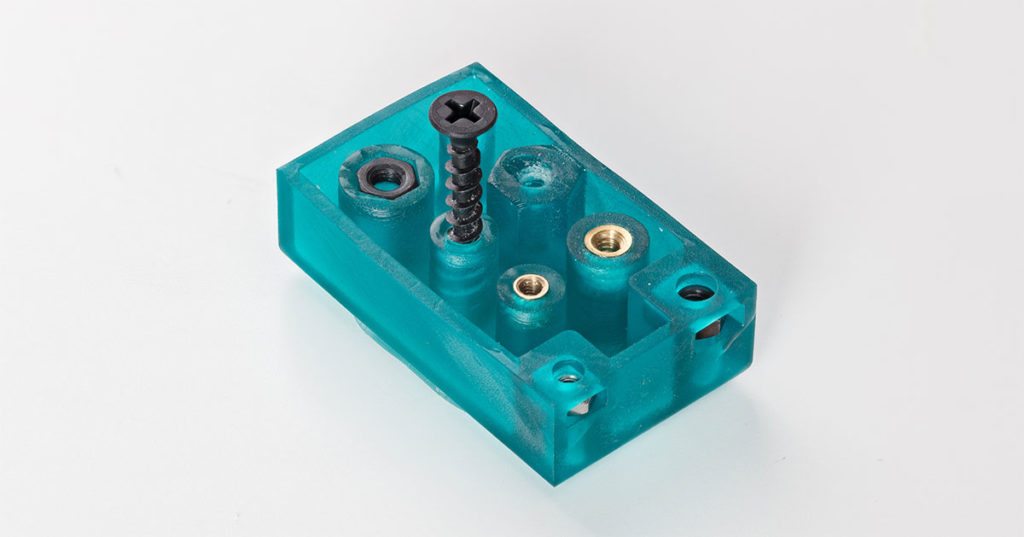
Pros: No need to buy specialty screws for plastics.
Cons: The screws hold firmly, but the threads won’t hold up to repeated use the way metal threads will.
We also tested wood screws in our Tough Resin and found that they functioned just as well as thread-cutting screws designed for plastics. Make sure to size the screw boss hole diameter between the major (thread) diameter of the screw and the minor diameter. The screw shown is a #8 wood screw in a 0.16 inch diameter hole.
Printed Threads
Pros: Can work to prototype larger threads and custom thread designs.
Cons: Not a durable or reusable fastening solution, especially at smaller scale.
Printing threads works better with our Standard Resins than Tough because they’re much harder. These threads will still be relatively delicate, depending on their size, and are not the best choice for a permanent reusable fastening system.
Generally, ¼–20 or larger creates functional parts without the need for post processing. For smaller screws, the threads should be customized to create a better fastener. For example, printing a semi-circular thread profile (on screw and nut) and using a 0.1 mm offset gives better thread engagement with improved wear characteristics. For all screws, it’s best to orient parts to avoid support structures touching any threads.